In this article, I show how you can switch through several scenes with one button in Home Assistant.
Set up the Scenes
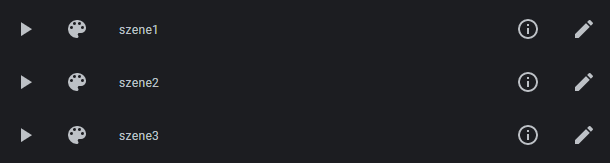
First, you create the scenes that you want to switch through. You make things easier if you do not use
spaces or other special characters for the names, but only lower case letters and numbers.
This way, the name is the same as the entity id that we will need later.
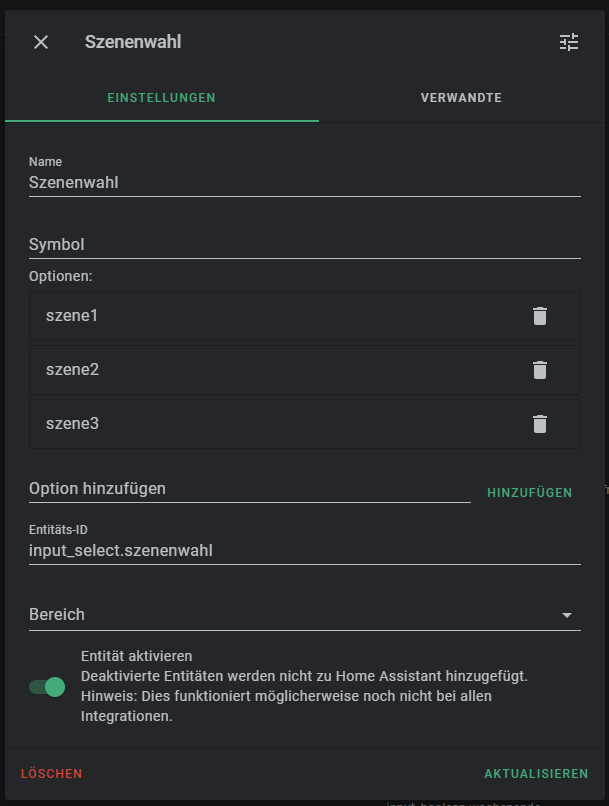
Set up an input_select Helper
The main trick is to create a input_select helper where the options are named the same as the scenes you
want to switch through. More precisely, the options must be named like the entity ids of the scenes.
Hence the tip above about the names of the scenes.
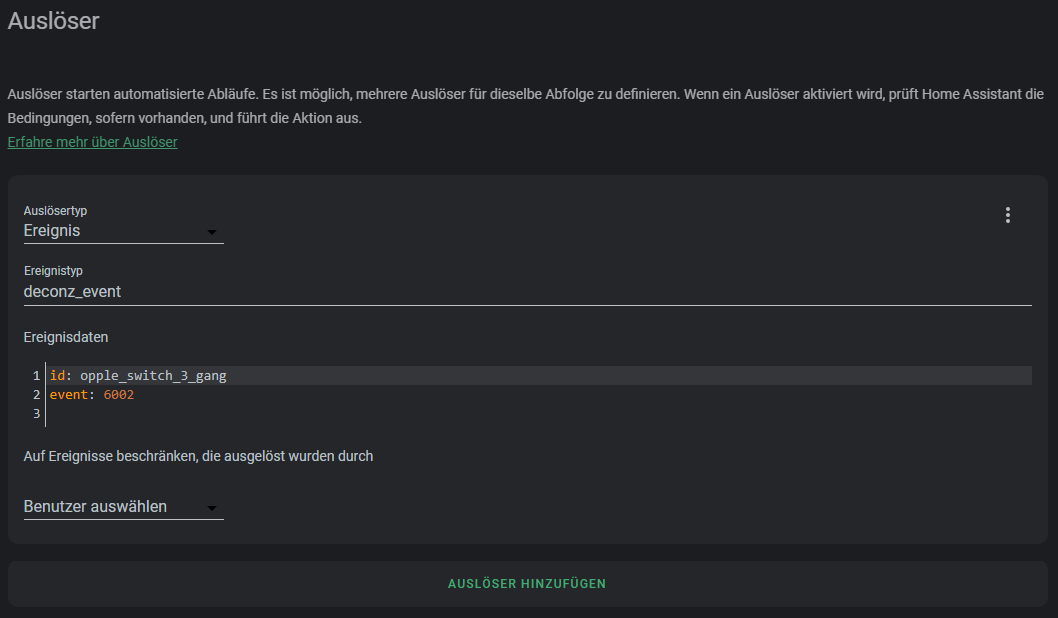
Set up the Automation
The Automation is relatively simple. You enter the button as the trigger. In my example here, it is a
Zigbee button, which is connected via Deconz, so I have to trigger on the appropriate event.
Of course you can also use any other any other trigger.
The first action in the automation switches the dropdown helper to the next entry. To do this,
the appropriate service is called. It is important that the option Cycle is activated so that the list
is always repeated from the beginning.
The second action contains a template, so you have to edit the action as YAML.
To do this, click on the three dots and select the appropriate option.
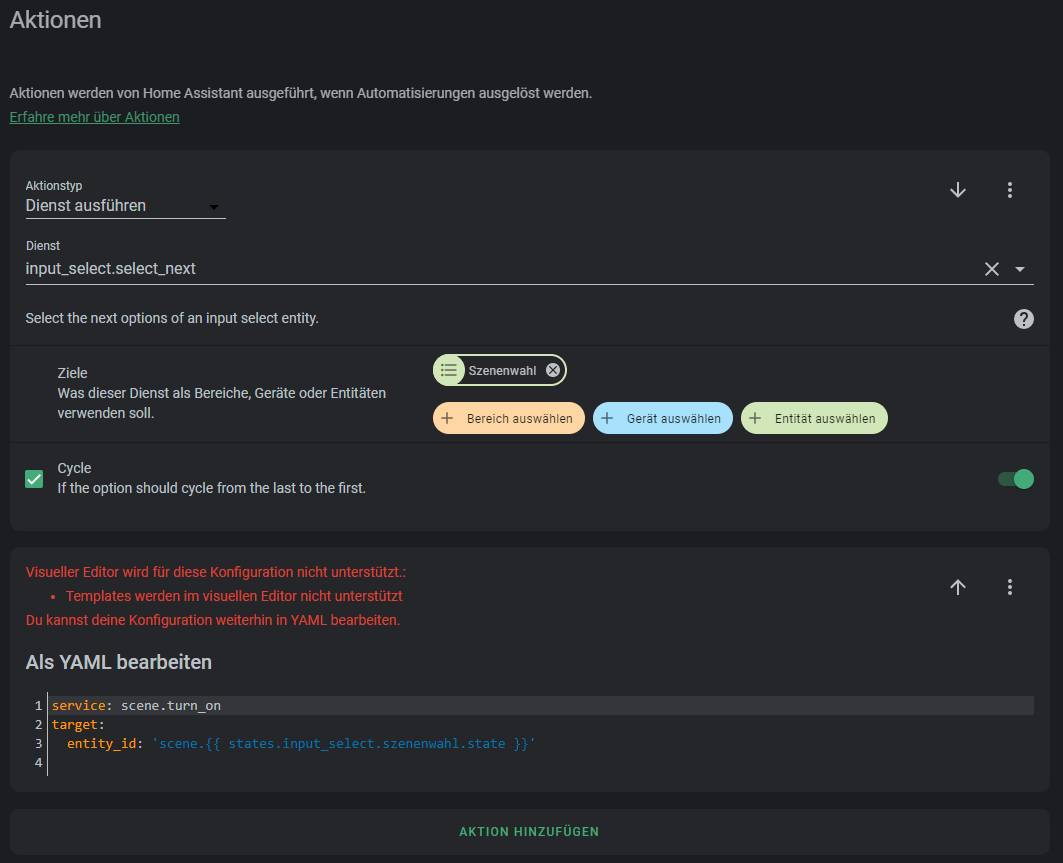
The template reads the current option of the input_select helper and composes the entitiy id of the scene from it, which is then activated.
|
|
Translated with www.DeepL.com/Translator (free version)