Window Controls Radiator
As I wrote in my article about my Smarthome setup, automation is what makes a smart home smart. Here I describe how I turn the radiator down when the window is opened and turn it back up again when the window is closed.
Update 2021-01-13: In the meantime, I no longer run the automation via Node-Red, but instead use the automations natively built into Home Assistant.
Involved Components
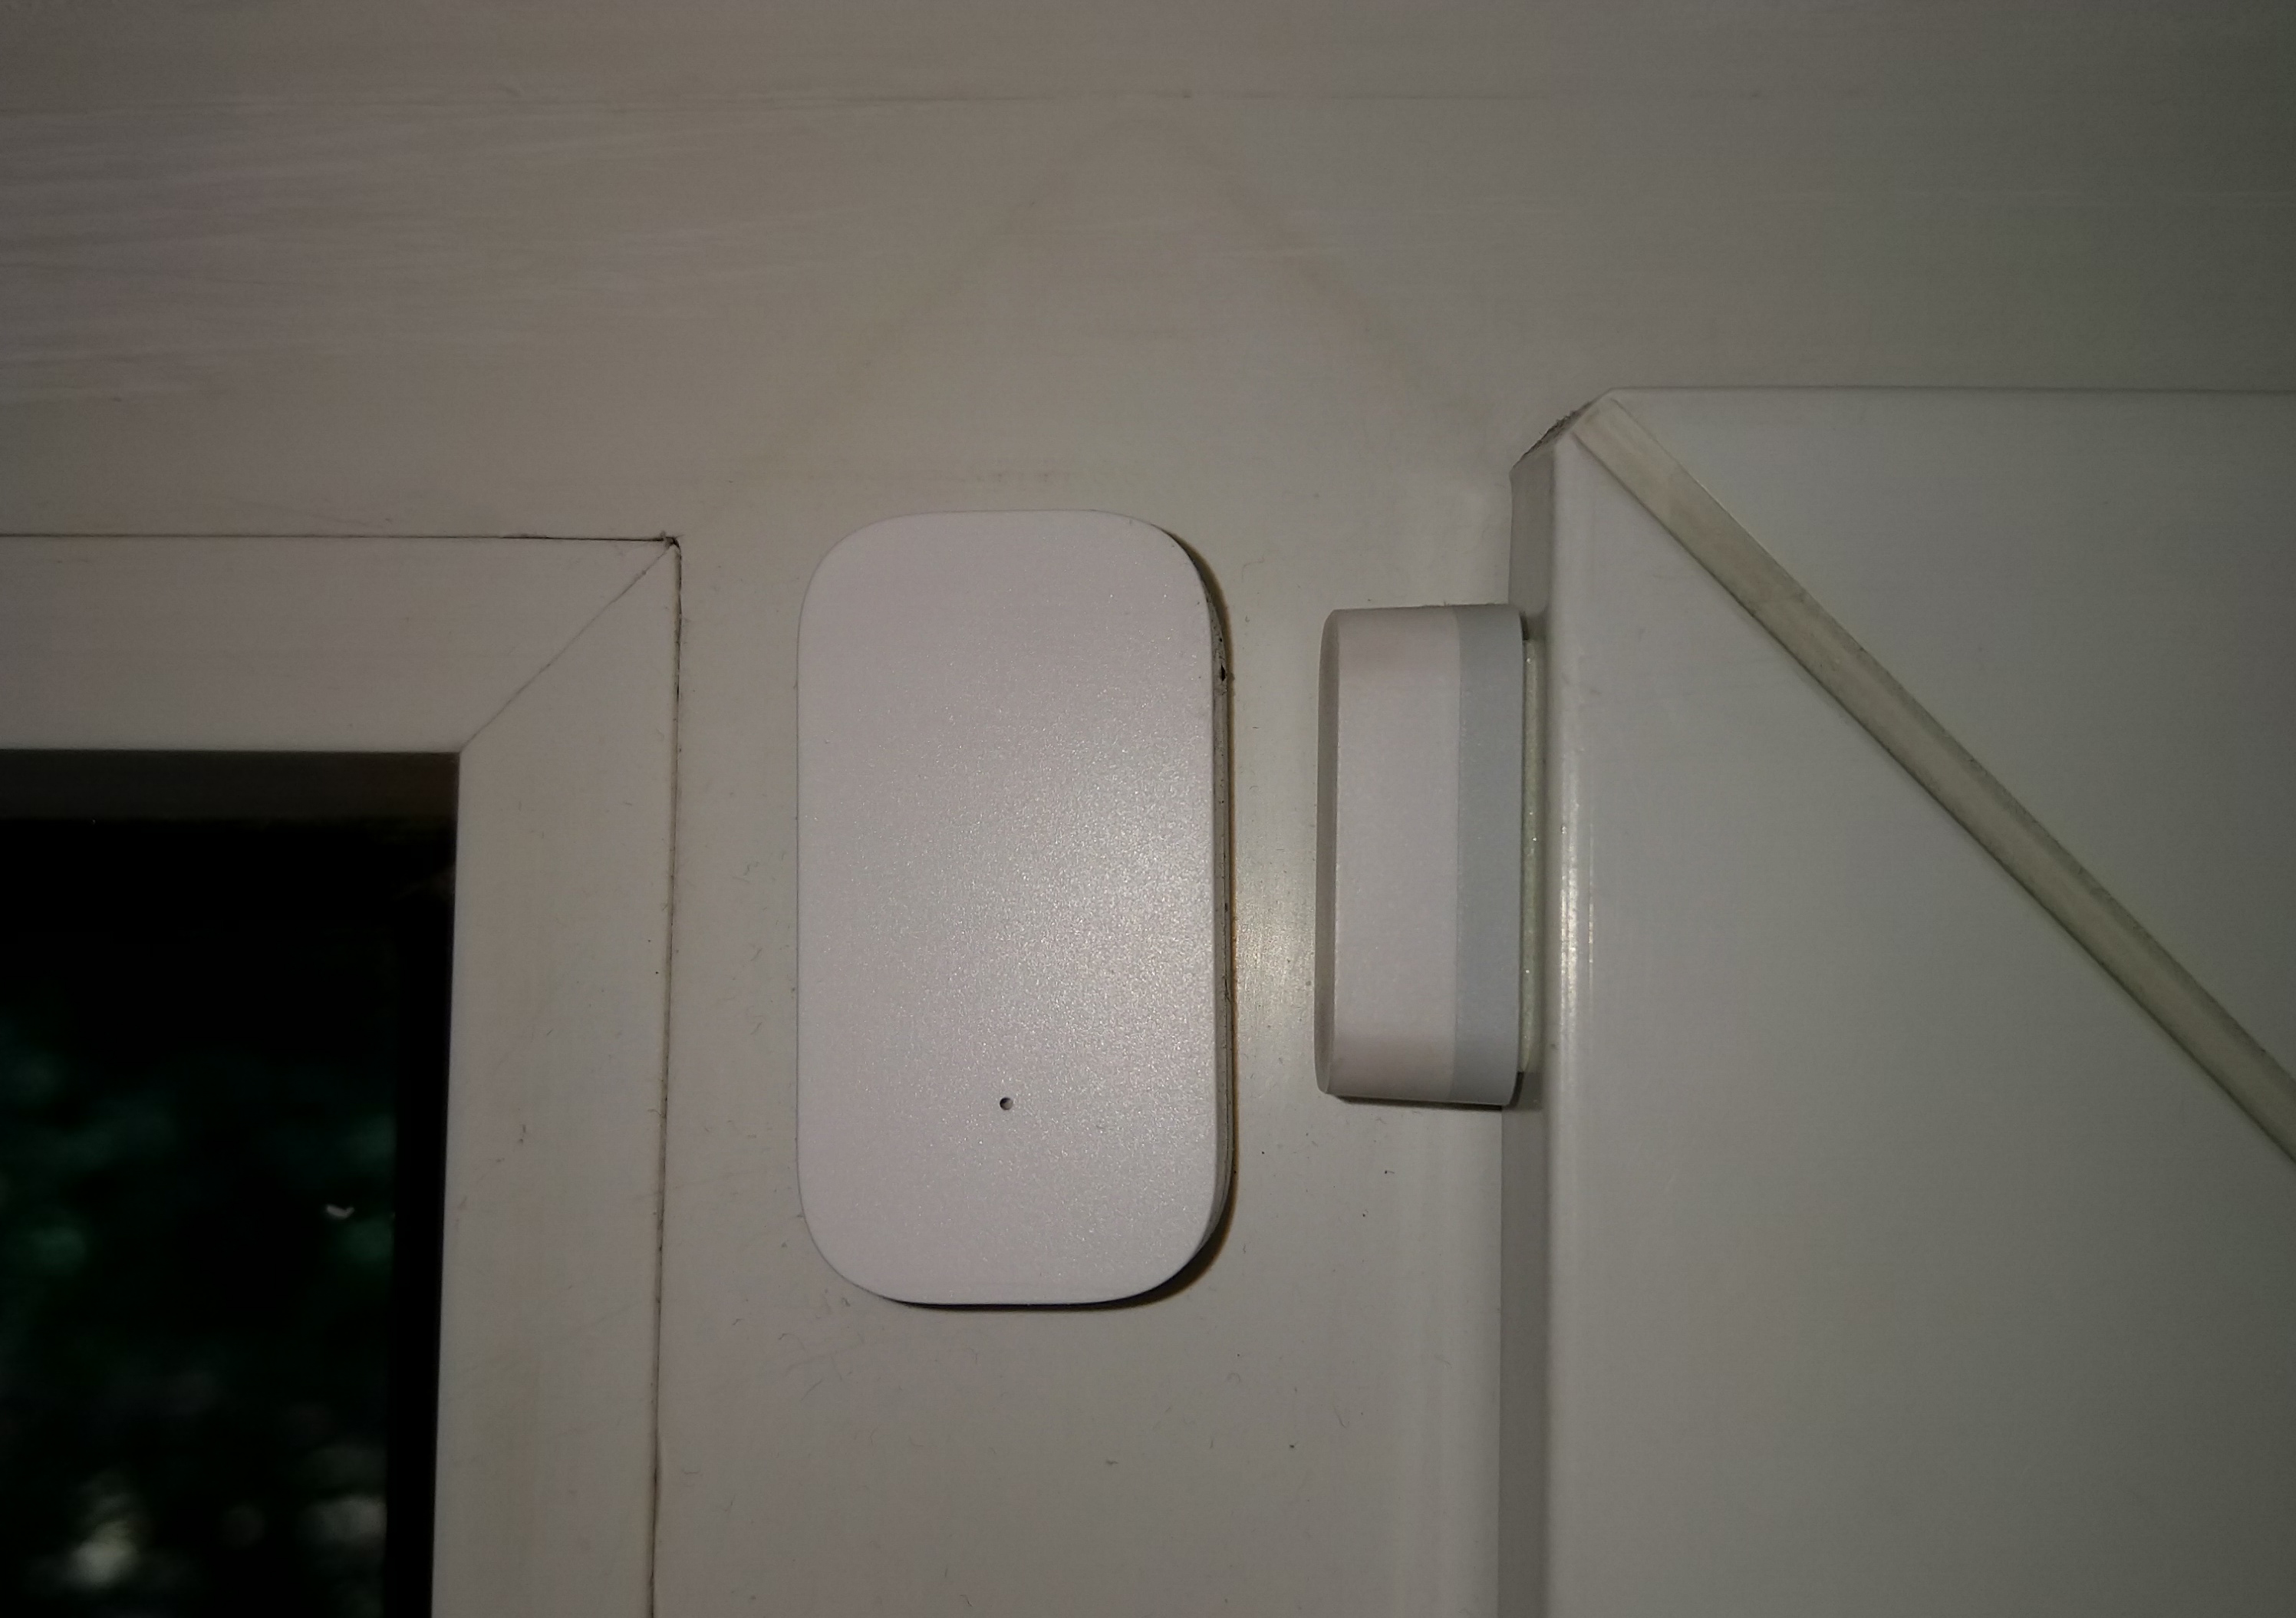
The window is monitored with a Xiaomi Aqara door/window contact. This sends the status via Zigbee to the Conbee Stick. The Conbee is integrated into Home Assistant via Deconz.
A Homematic radiator thermostat is mounted on the radiator. As Homematic central I have a Raspberry Pi with Raspberrymatic running. The thermostats are always set to manual, because they are controlled exclusively via Home Assistant.

The reduced temperature is set via an input_number entity.

Automation in Home Assistant
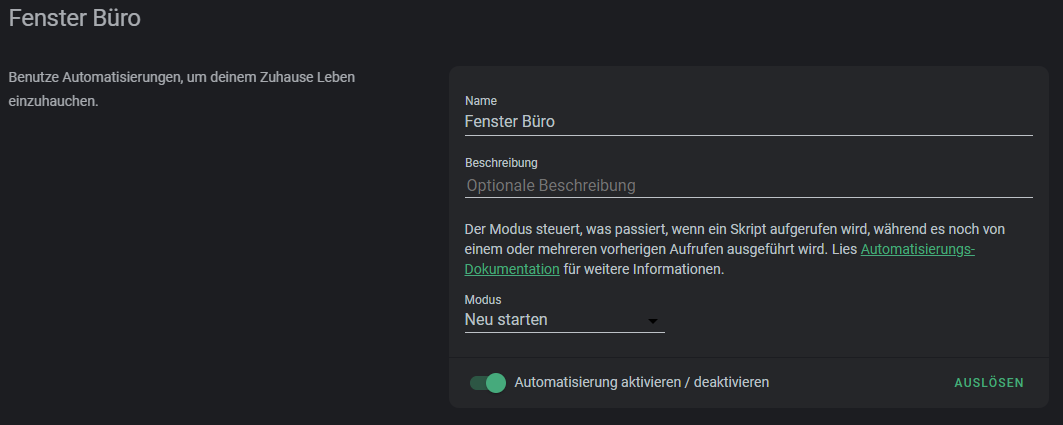
I have created an automation for each window. The automation runs in Restart mode because I use a Wait action and any instances of the automation that are still running will be cancelled as a result.
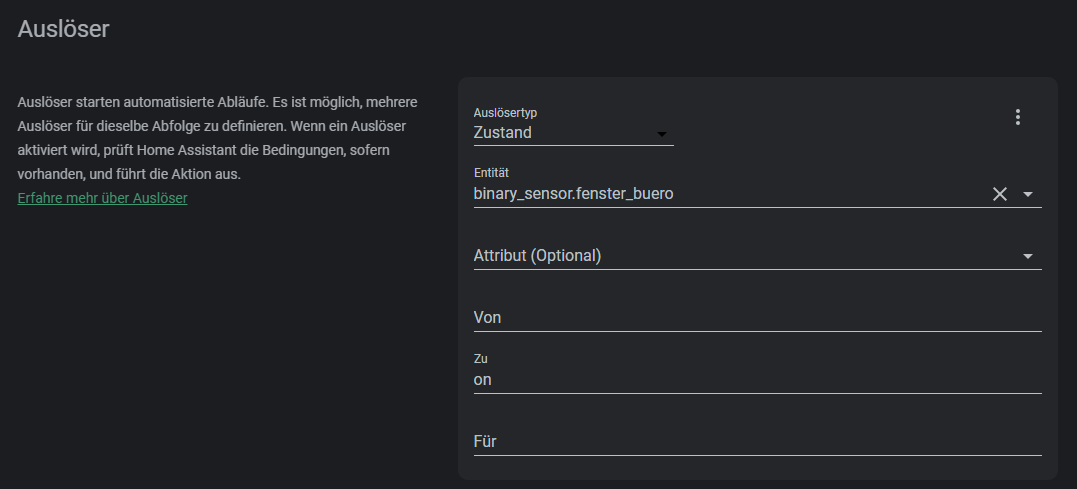
The trigger is quite simple: When the window contact changes state to on, the window is open and the automation should start.
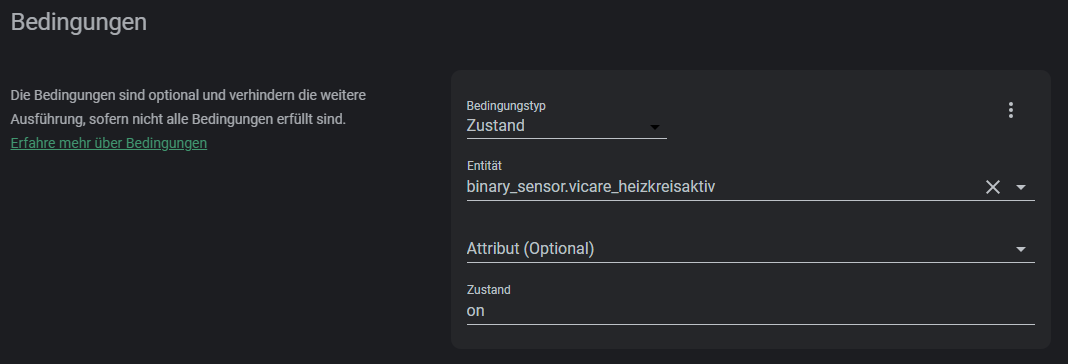
I have added a condition here that my heating system must be running. When the heating is switched off in summer, the automation should not mess with the radiator.
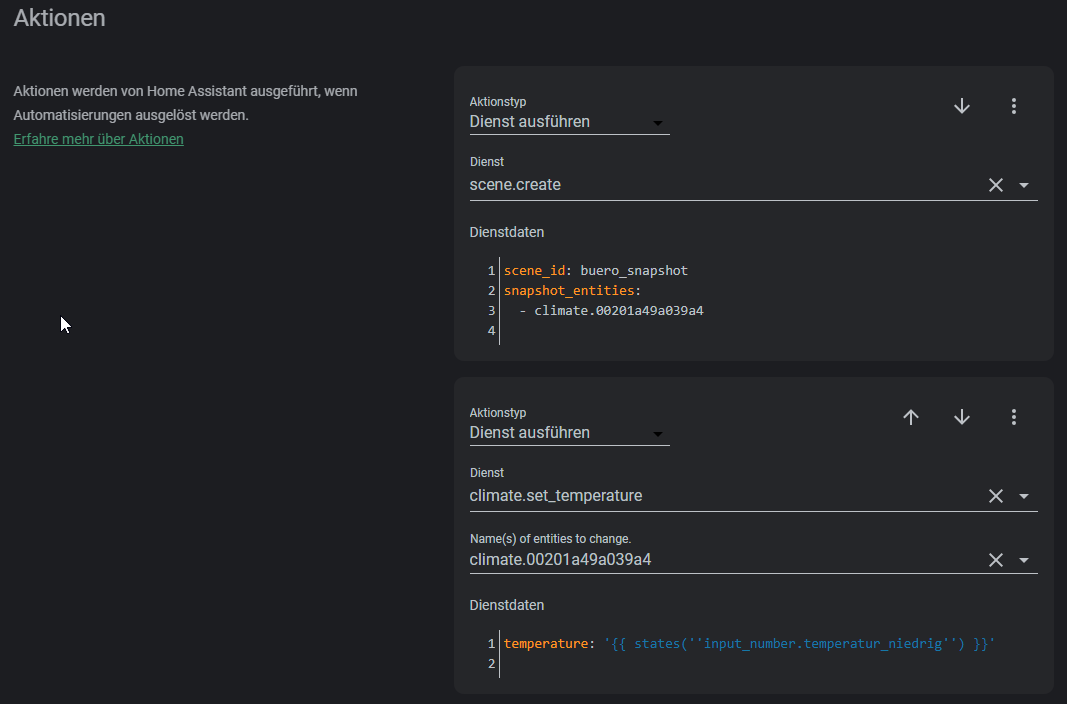
Now follow the actions that are to be carried out. First, a temporary scene is created in which the state of the thermostat is saved.
For this, the service scene.create is called and a scene_id and the entities are passed.
Next, the service climate.set_temperature is called. The temperature is not entered as a fixed value, but is read from the input_number helper with the help of a template.
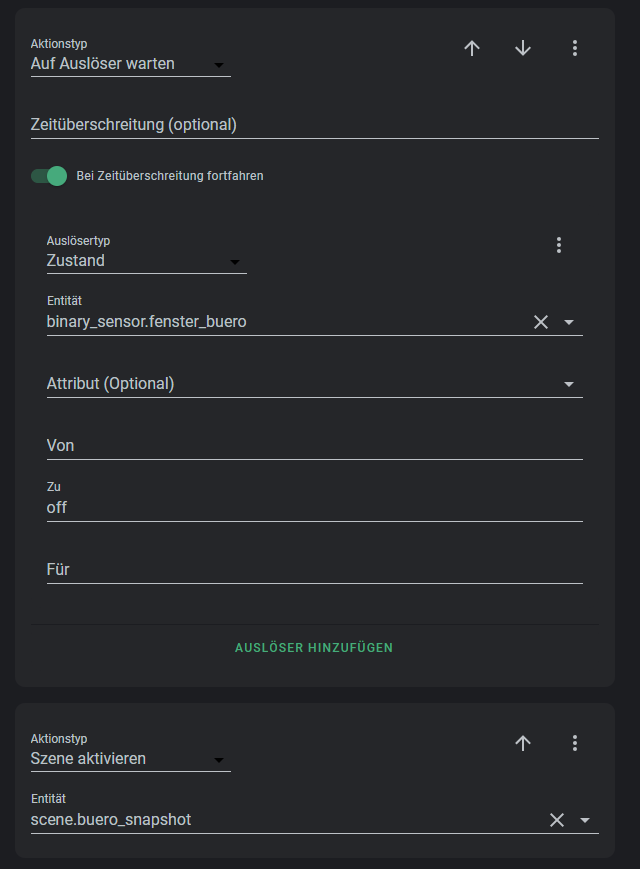
Next, a Wait for trigger action is started, which pauses the automation until the window contact reports closed again. No timeout is entered, so that the automation theoretically remains active forever.
When the window is closed again, the last action is to activate the previously saved scene.
Here is the complete YAML for import:
|
|
NodeRed (no longer used)
The automation is implemented in NodeRed and consists of six nodes.

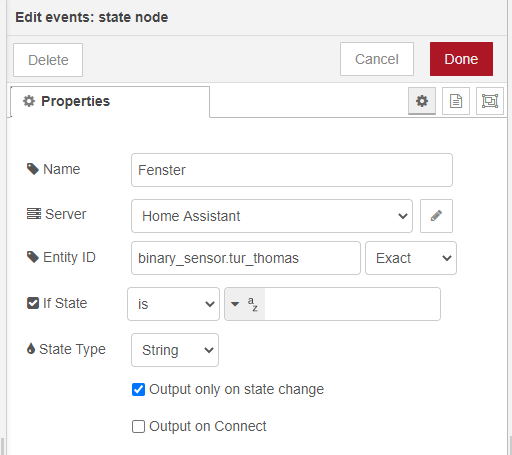
The state node “Fenster” reacts to a change of state of the window contact.
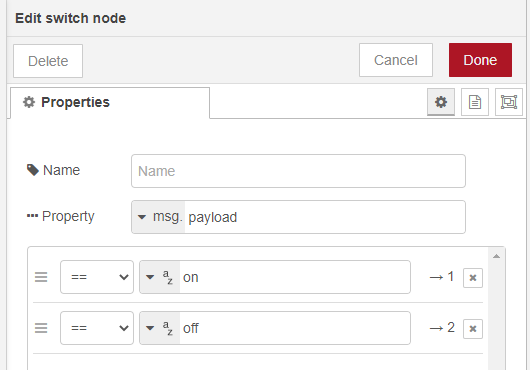
The switch node branches into the upper or lower path, depending on the state. The binary sensor of the window contact has the state on when the window is open and off when the window is closed.
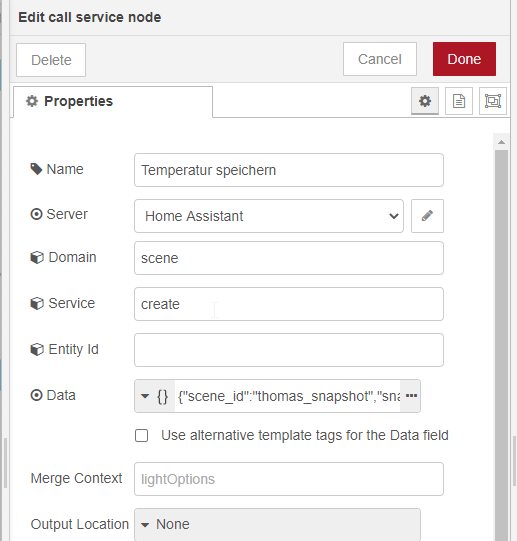
When the window has been opened, the first thing to do is to save the current status of the thermostat in a temporary scene with the call service node. In the data field, the name of the scene and a list of the entities to be saved must be passed.
|
|
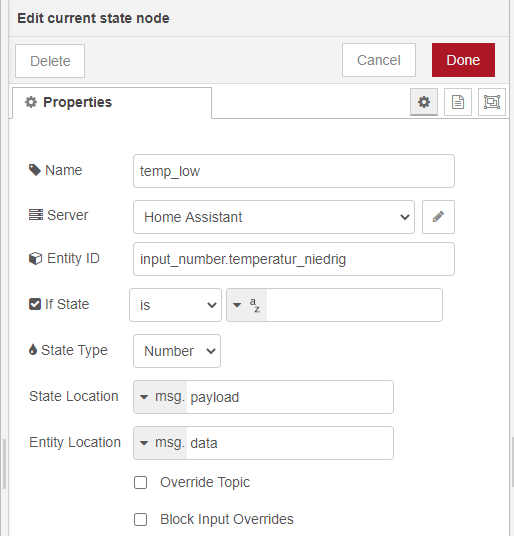
Next, the value of the input_number entity is read with a current state node.
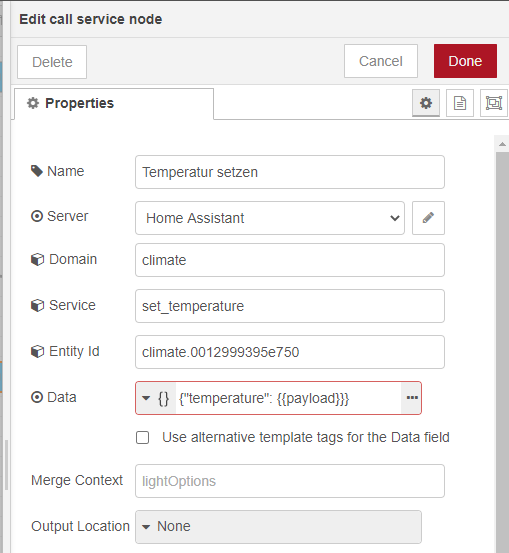
Finally, the thermostat is set to the readout value with a call service node. For this purpose {{payload}} is used as a template in the data field.
|
|
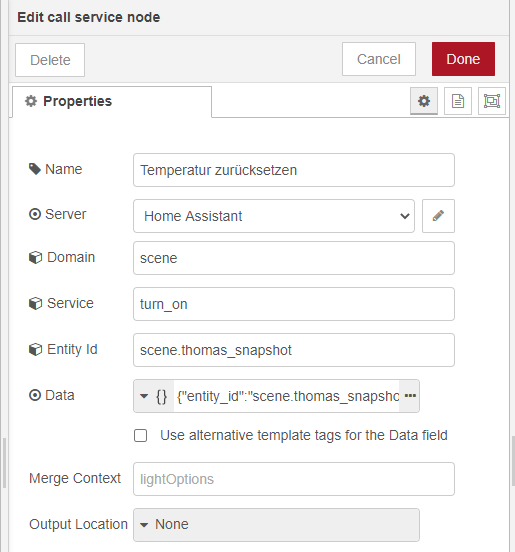
When the window is closed, the previously saved scene is activated with another call service node. Here only the name of the scene must be passed in the Data field.
|
|
Such a flow is used for every room in which a smart thermostat is installed. The advantage of this method with a temporary scene is that it can be expanded easily. If additional entities are to be considered, they only need to be added at one point.
Here is the complete flow to import:
|
|