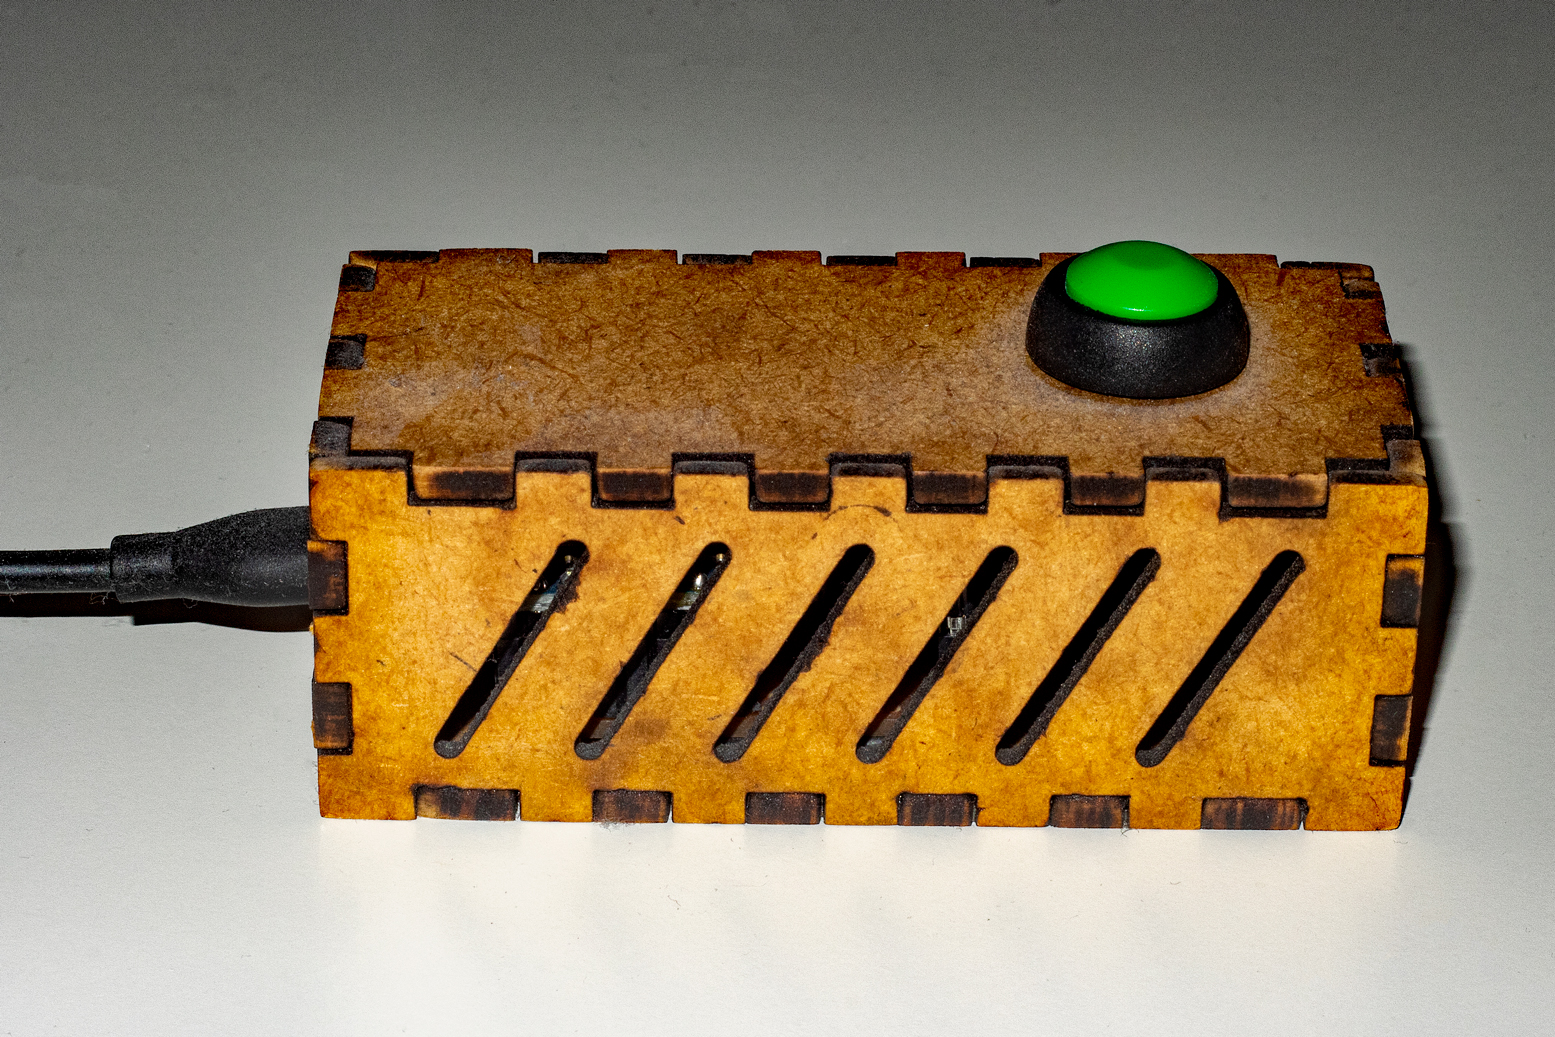
In this post I show the steps to recreate my environmental sensor with a button. The sensor measures temperature, humidity and air pressure and has a button to trigger any action.
Preparation
What ist ESPHome?
According to the self-description on esphome.io, ESPHome is a system for programming ESP8266 or ESP32 microcontrollers using simple configuration files.
ESPHome is written in python and can be installed without Home Assistant using pip install esphome or with docker pull esphome/esphome. I use ESPHome as a home assistant addon, because you also get a web interface for administration.
Needed Hardware
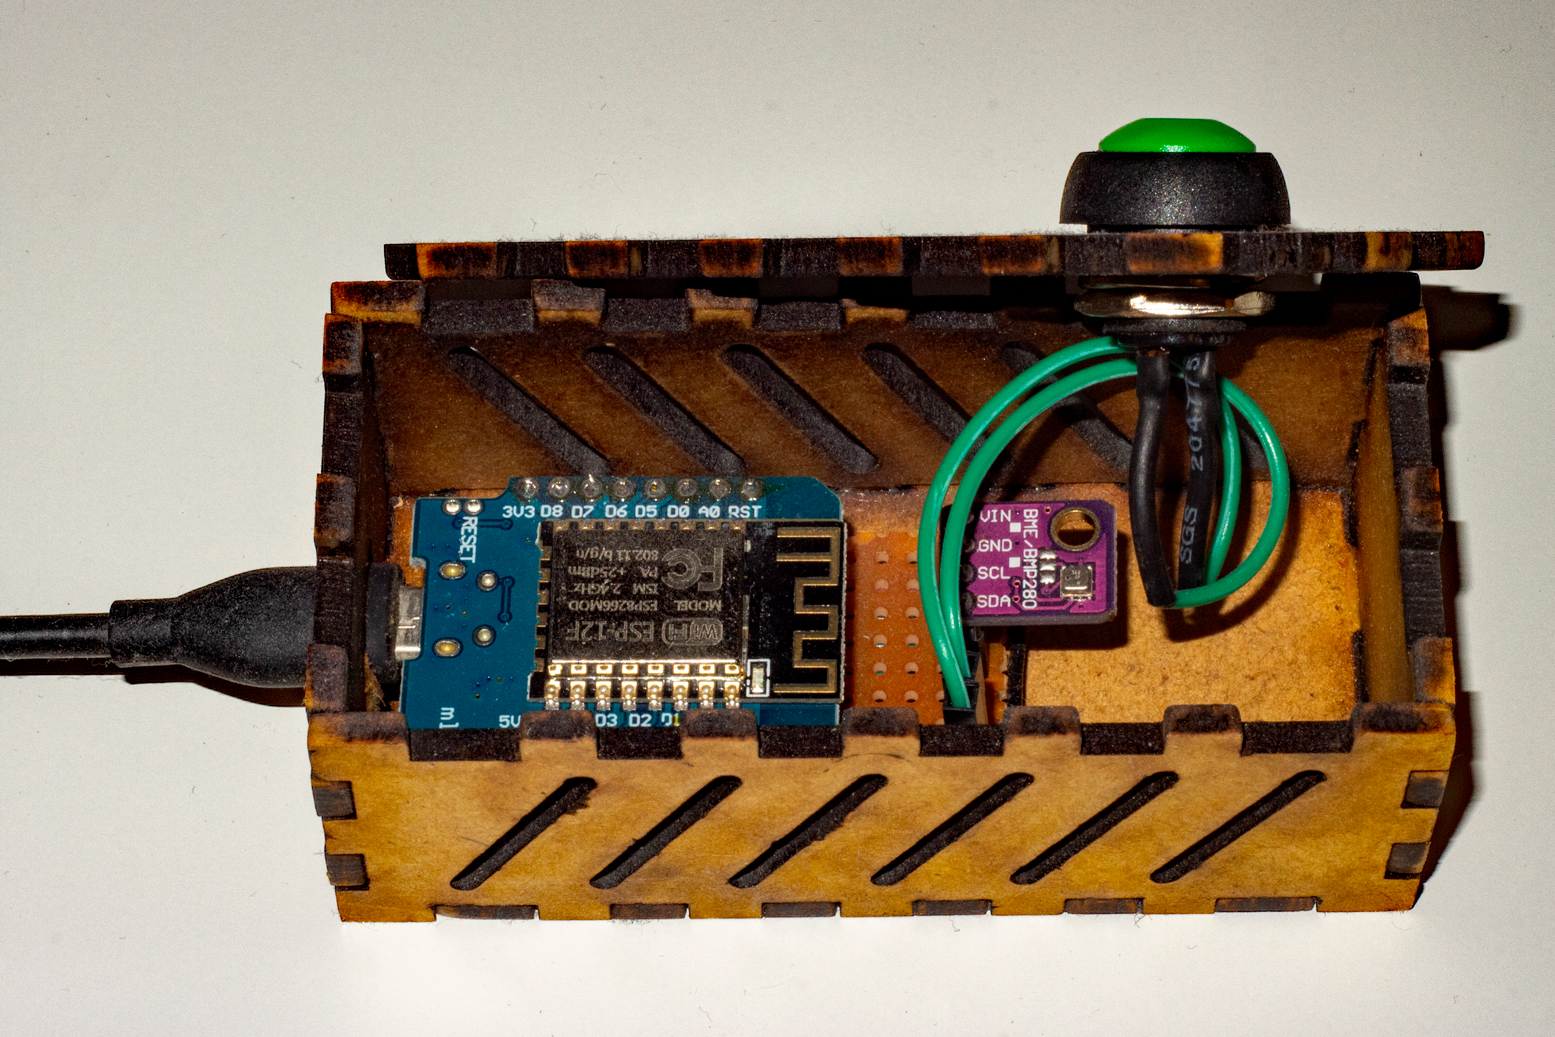
- ESP8266 microcontroller - e.g. Wemos D1 mini
- BME280 sensor - with I²C breakout board
- push button
The housing is lasered from 3mm MDF. A generator for such housings is for example boxes.py.
Connect Sensor and Button
The BME280 is connected via I²C, for this we need the following pins:
- 5V → VIN
- G → GND
- D4 → SDA
- D5 → SCL
You can freely choose the pin for the button, but there are some pins that trigger special functions when booting. I used pin D3 here, the second pin of the button is connected to GND.
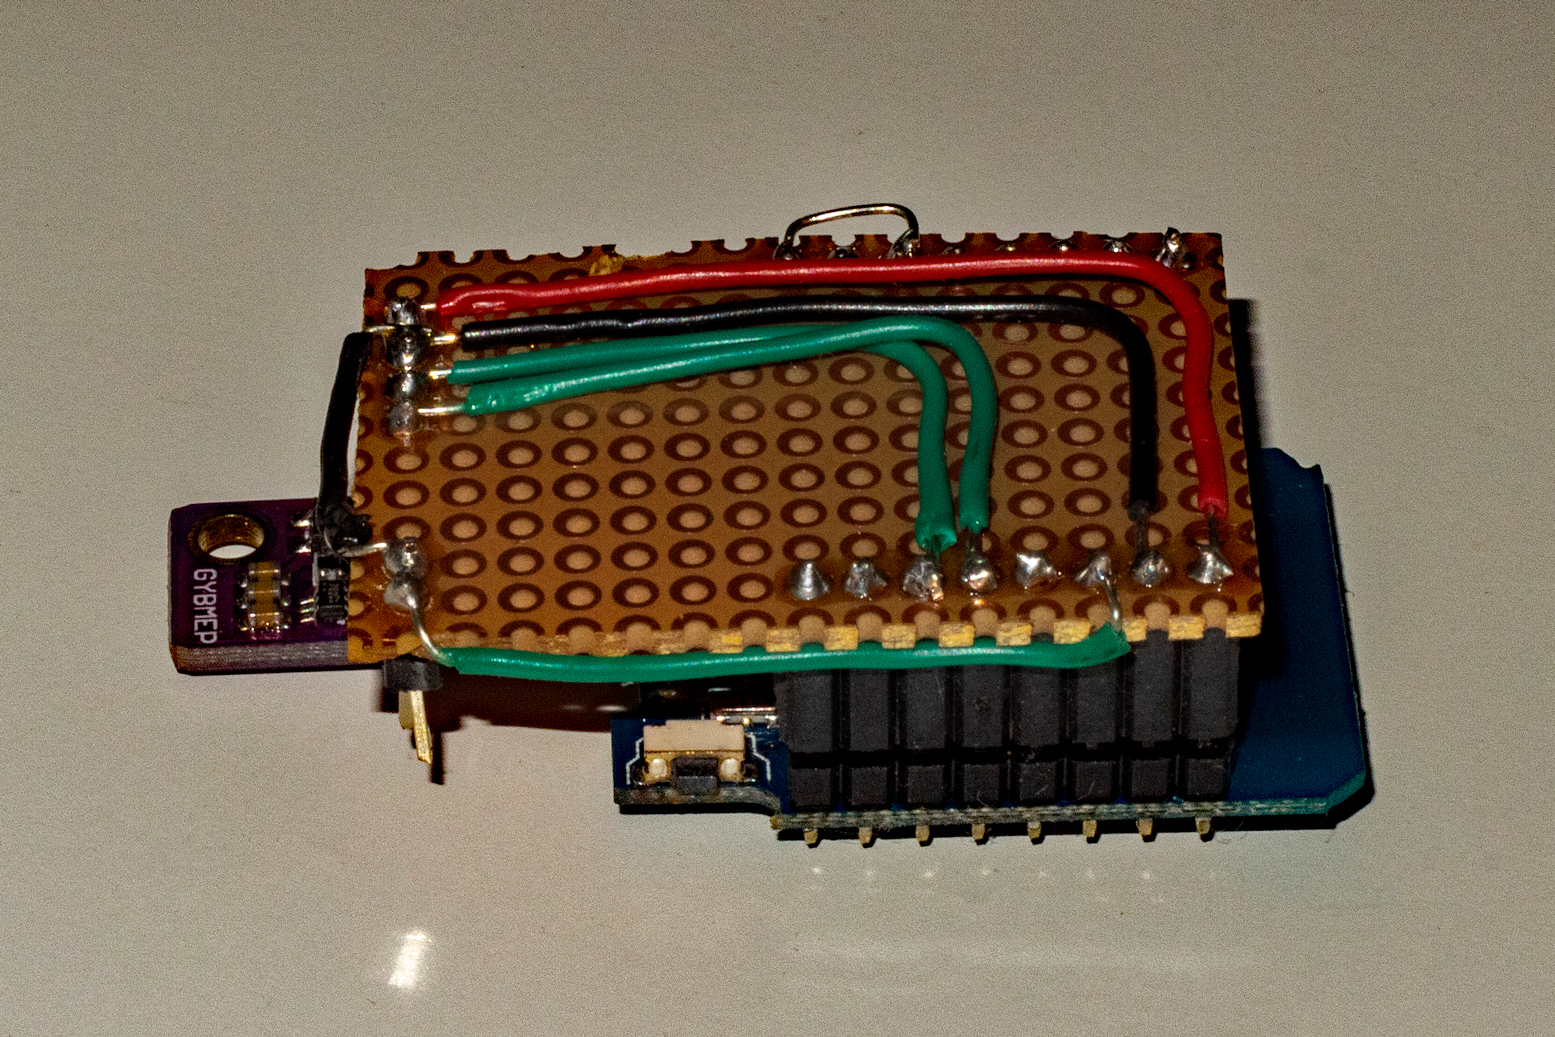
I built the whole thing with plinths on a breadboard in order to be able to easily disassemble the components.

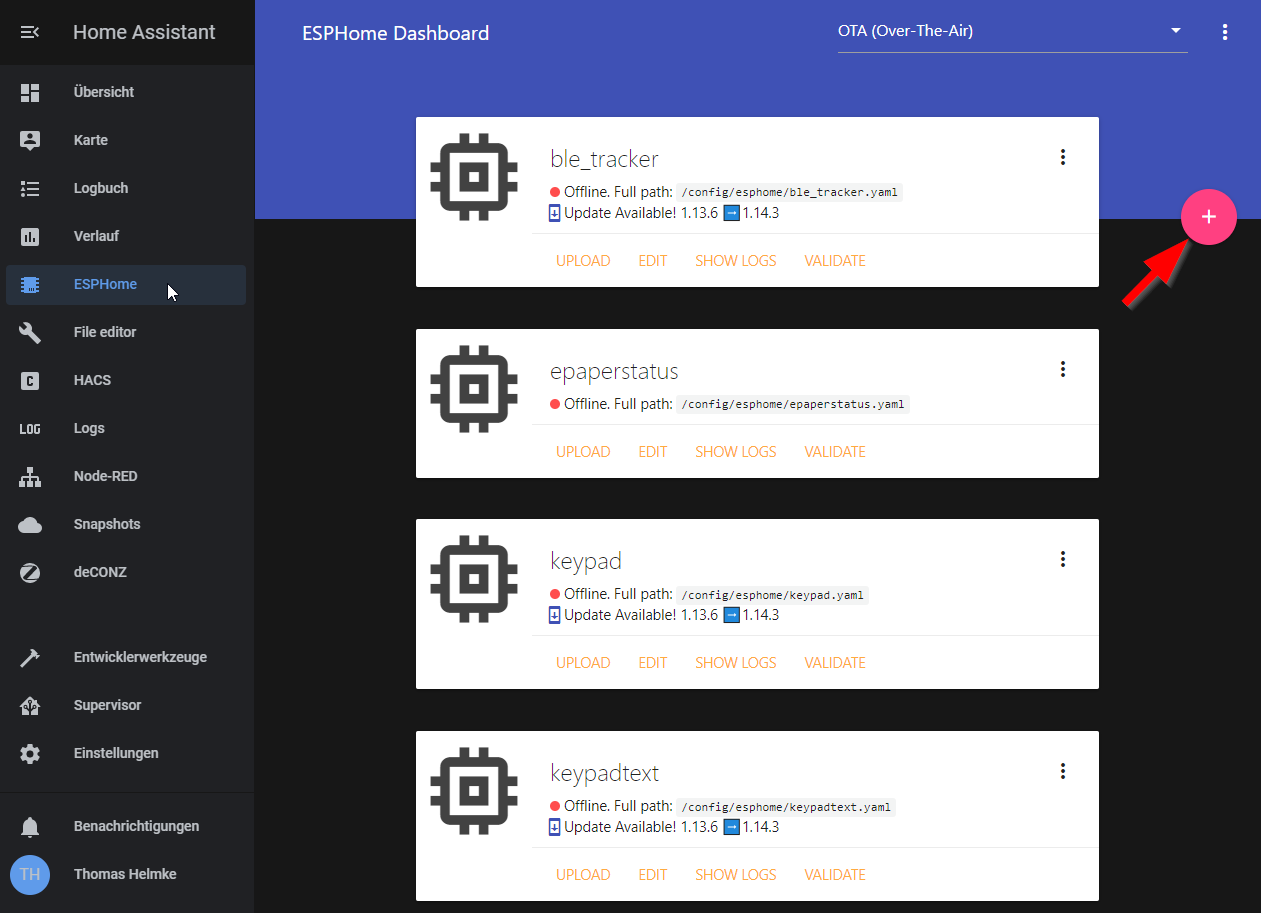
ESPHome Project in Home Assistant
Create Project
Click on the friendly red button with the plus on the web interface to open the wizard for new projects.
First you give a name.

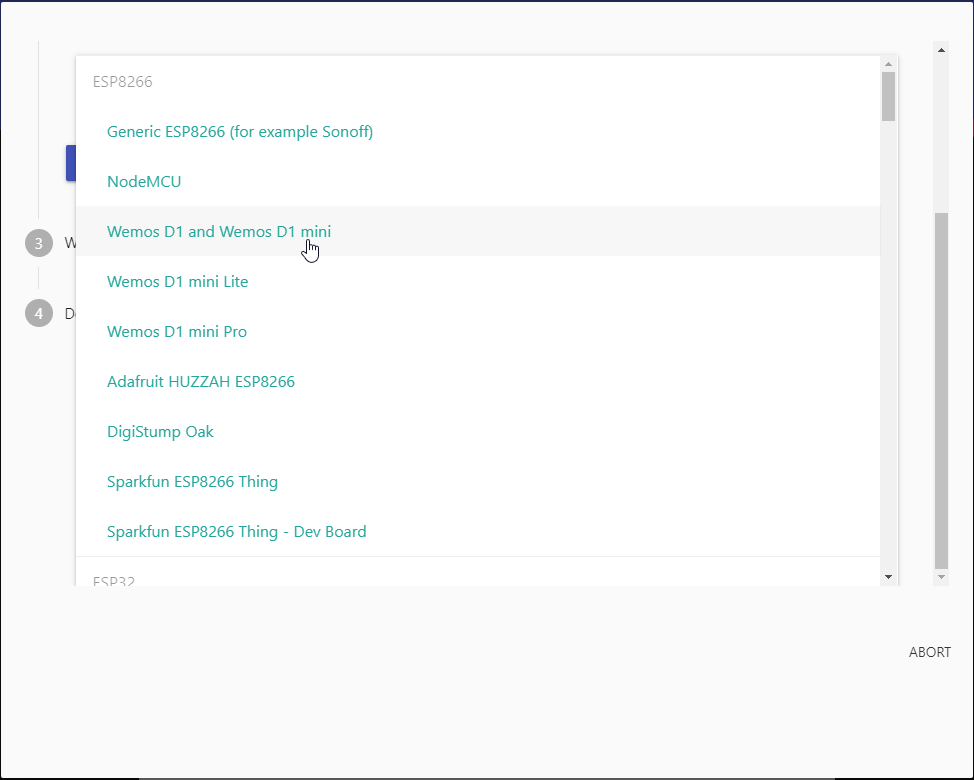
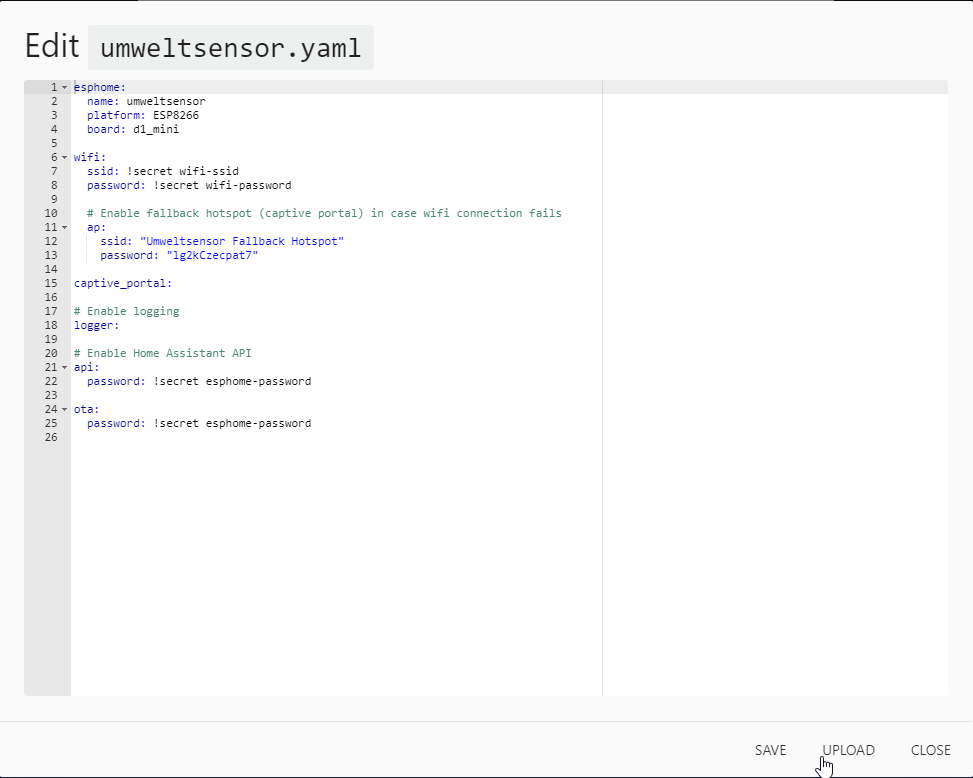
The second step is the selection of the microcontroller. I use the Wemos D1 mini for most projects.
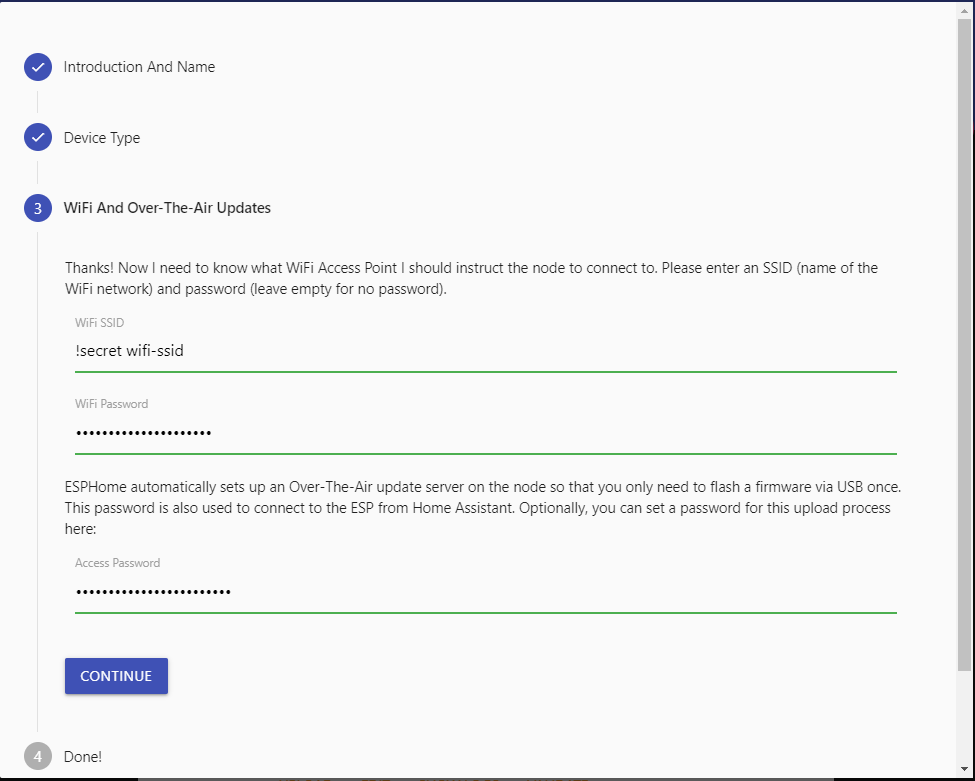
The last step is the specification of the WiFi data and the password for the over-the-air update. I use the !secret notation known from Home Assistant. Details on this below.
The wizard is now complete and shows us the next steps to program the microcontroller.
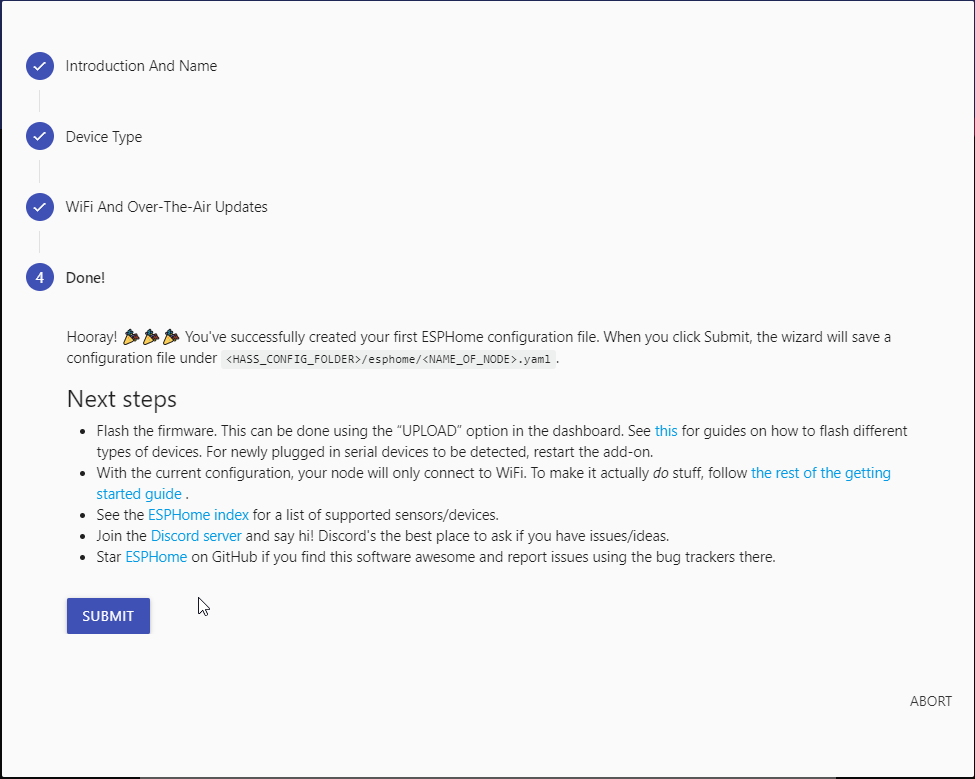
After closing the wizard with Submit, the interface selection in the upper corner is pointed out.
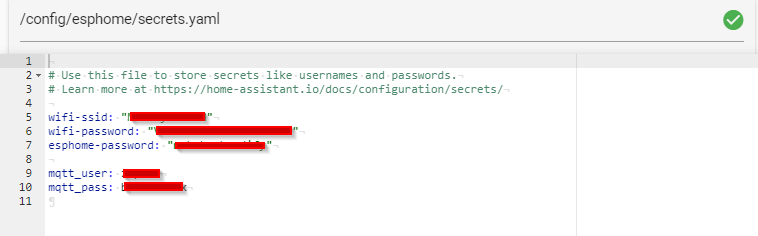
Fileorganisation and !secrets
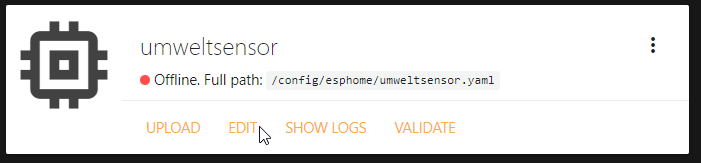
In Home Assistant, the project files are in the directory /config/esphome. The example given has created the umweltsensor.yaml.
|
|
I created a secrets.yaml in the same directory. The entries in it can be imported into other .yaml files with!secret. This has the advantage that you can share the project file with others, like me here, without having to pass on your credentials.
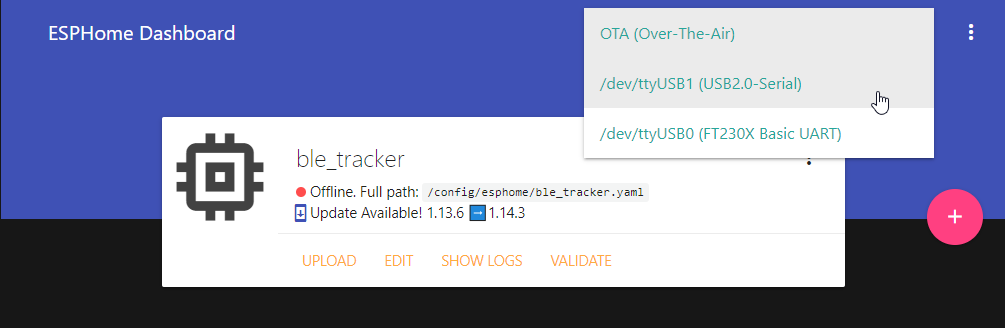
Flashing for the First Time
For the first flashing, the microcontroller must be connected via USB to the computer on which ESPHome is running. In my case, the Raspberry Pi where Home Assistant is installed.
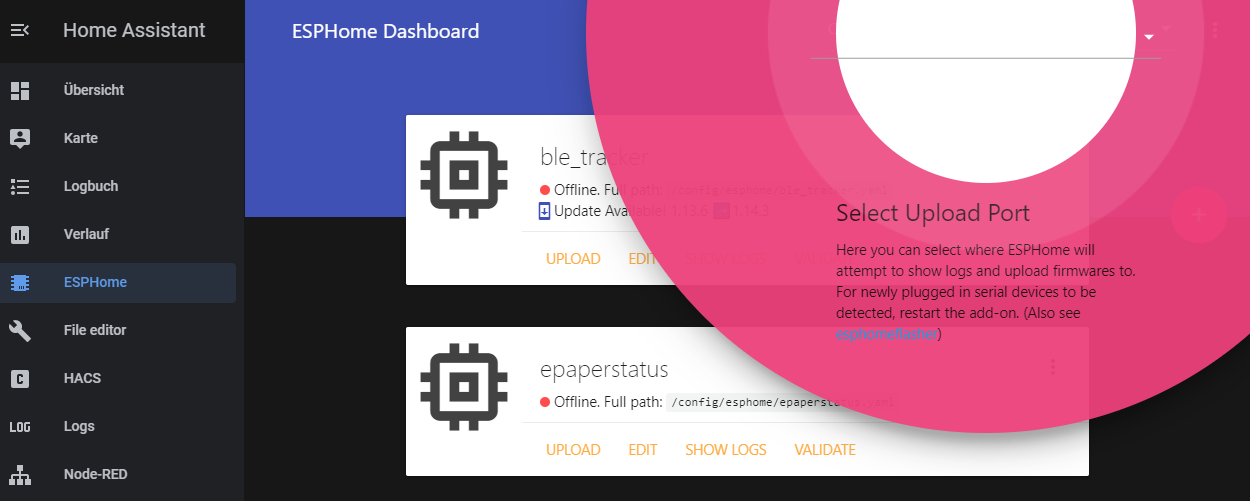
Most of the time, the port of the microcontroller is not displayed immediately when the USB cable is connected. This is related to the Docker system based on the Home Assistant. The workaround is to restart the addon after the microcontroller is connected.
If nothing else is connected, /dev/ttyUSB0 is probably displayed, in my case the microcontroller is at /dev/ttyUSB1.
In order for the access data to be imported correctly, we still have to edit the generated .yaml file and remove the quotation marks from all entries with !secret. To do this, click on EDIT under the corresponding entry.
Finally you click UPLOAD to start the flashing.
If everything worked correctly, the Arduino code should now be generated from the .yaml file. All the necessary libraries are downloaded in the background, the code compiled and the upload started.
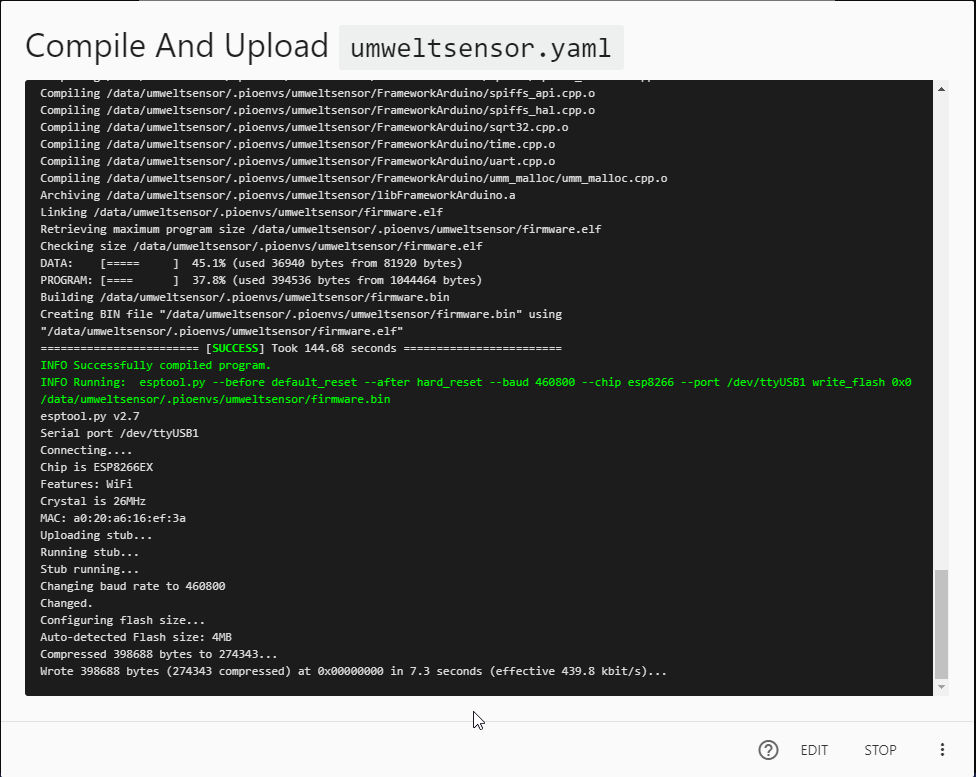
In the following logging output you can check whether you have entered the WiFi data correctly.
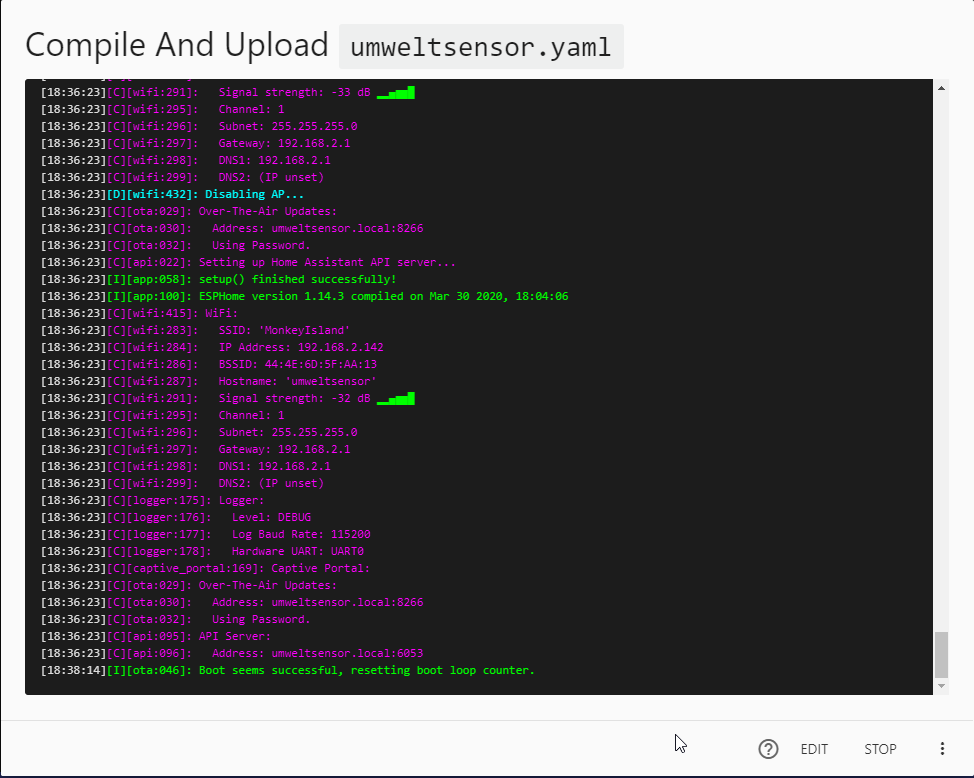
From now on you can disconnect the microcontroller from the Raspberry Pi and program it via WiFi. To do this, switch the interface above to over-the-air.
Configure Sensor and Button
For the sensor to be addressed the I²C component is loaded first. The scan: True option ensures that the bus is scanned for devices on every boot.
|
|
Since the BME280 measures three parameters, the three options temperature, pressure and humidity must be configured accordingly.
In filters: for the temperature sensor, a static offset of -7 degrees is set that I have determined in comparison with a second sensor. Likewise, a static offset of +10 percent is set for the air humidity.
|
|
The button is configured as a binary sensor. Since the button is connected to GND, the internal pull-up resistor must be activated and the state inverted with inverted: True. The sensor therefore delivers on when the button is pressed.
|
|
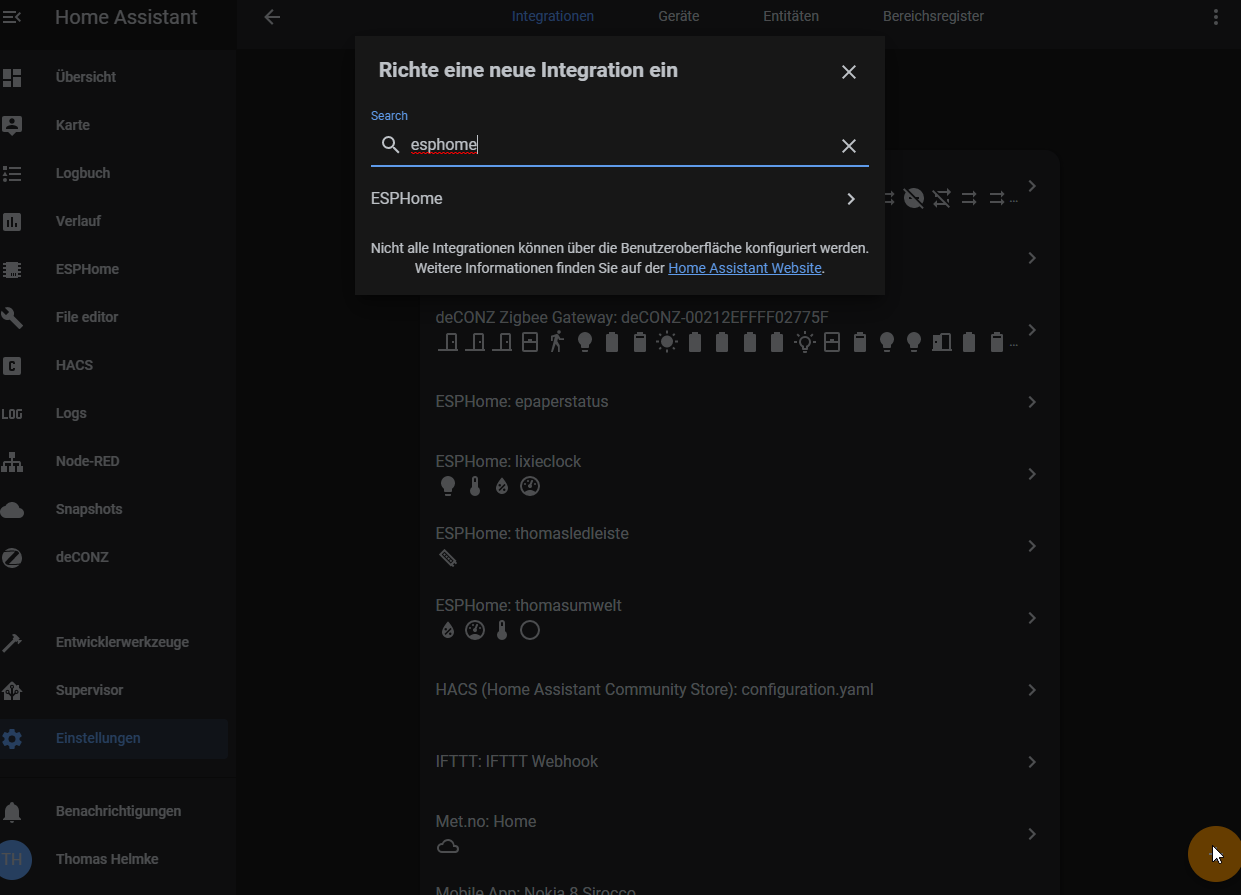
Connecting to Home Assistant
After the complete program has been loaded onto the microcontroller, the sensors must still be integrated in Home Assistant. The setup is done via the integration page in the Home Assistant settings.
Enter the name of the project as the host address, in this case umweltsensor.local.
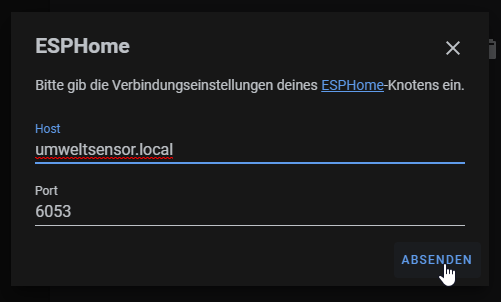
After the API password query, the entities for the configured sensors are automatically added to Home Assitant.
