Anyone can use a normal bell
With a classical doorbell, pressing the bell button closes an electric circuit and thereby activates a bell or similar. For the integration of such bells there are plenty of instructions and more or less ready-made solutions for the integration into smarthome systems.
In apartment buildings, however, there are often doorbell systems that are somewhat more complicated in design with intercom, door buzzer, light control, etc.
TCS Doorbell Systems
I have such a system from TCS installed in my building. Here, all apartment units are connected in parallel to a proprietary bus and react to directly addressed messages.
Understanding the doorbell system
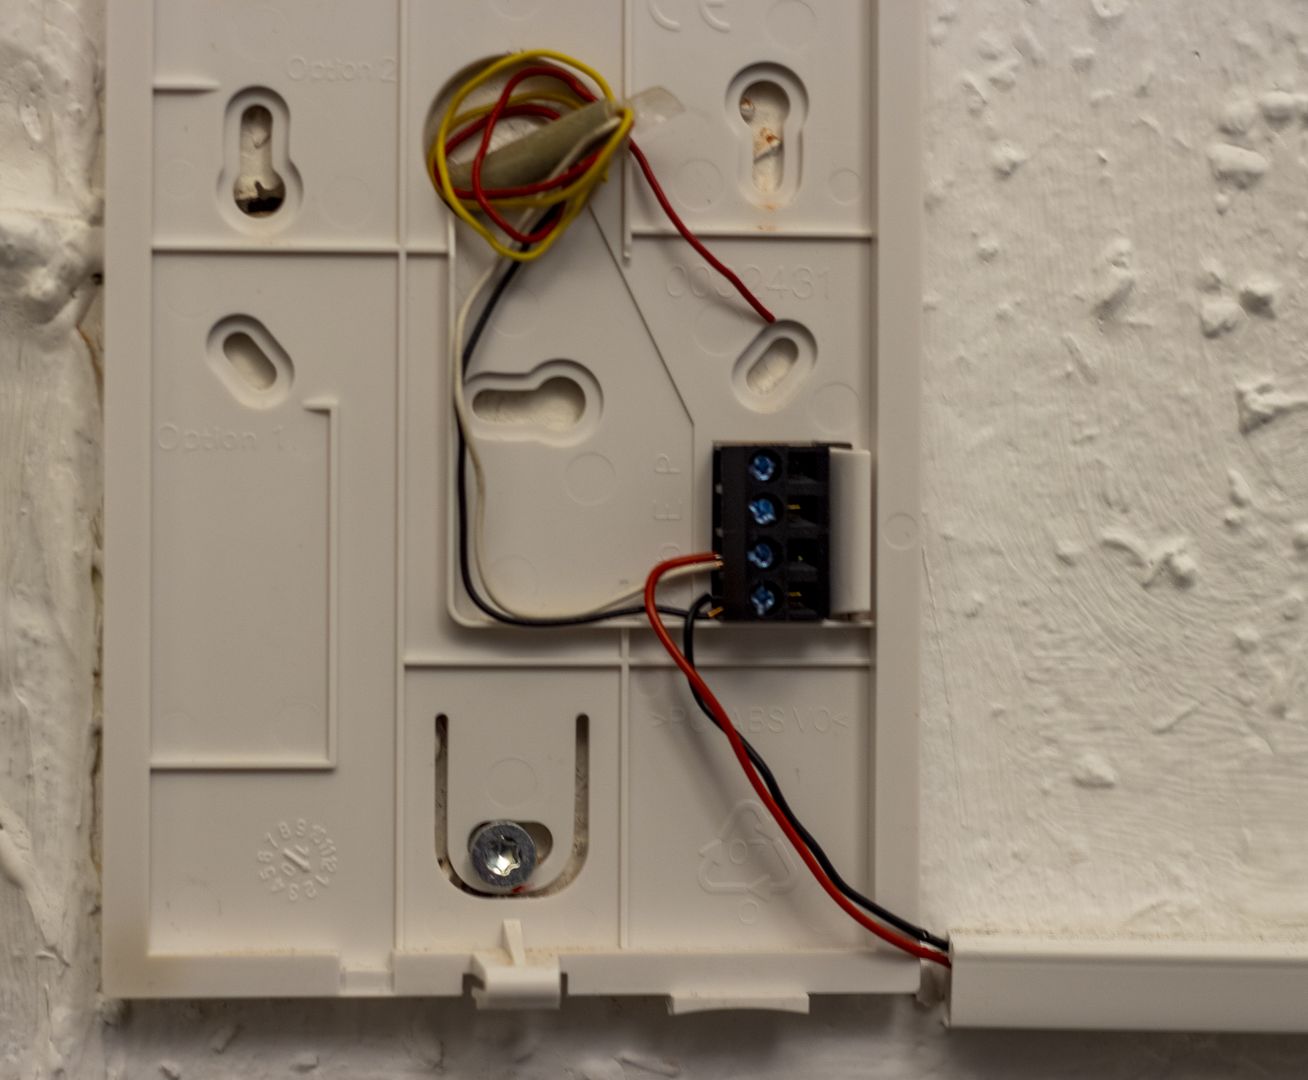
The first step is to understand the electrical side. If you take the apartment unit of the bell from the wall,
you will find only two wires. With the multimeter you measure 24V here, which will be reduced a bit when the bell is activated.
From the few sources on the Internet about the TCS system, one learns that the 24V are pulled to 0V for one or two milliseconds to encode zeros and ones of a binary protocol. Aaron Christophel has a video in which he reverse-engineered the protocol with an oscilloscope.
The short version is that each connected device has a unique address and the different actions like ringing, door buzzer or switching on the light are sent as messages on the bus. The messages are either four or eight bytes long and are processed by a microcontroller in the apartment unit.
Listening to the bus
Since the bus is a voltage signal, we can simply connect to the bus in parallel and listen to the messages.
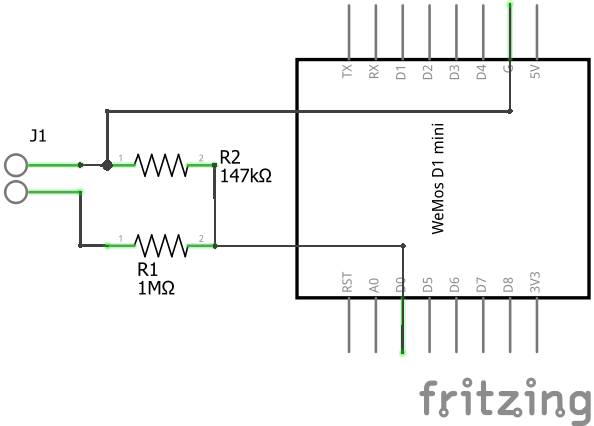
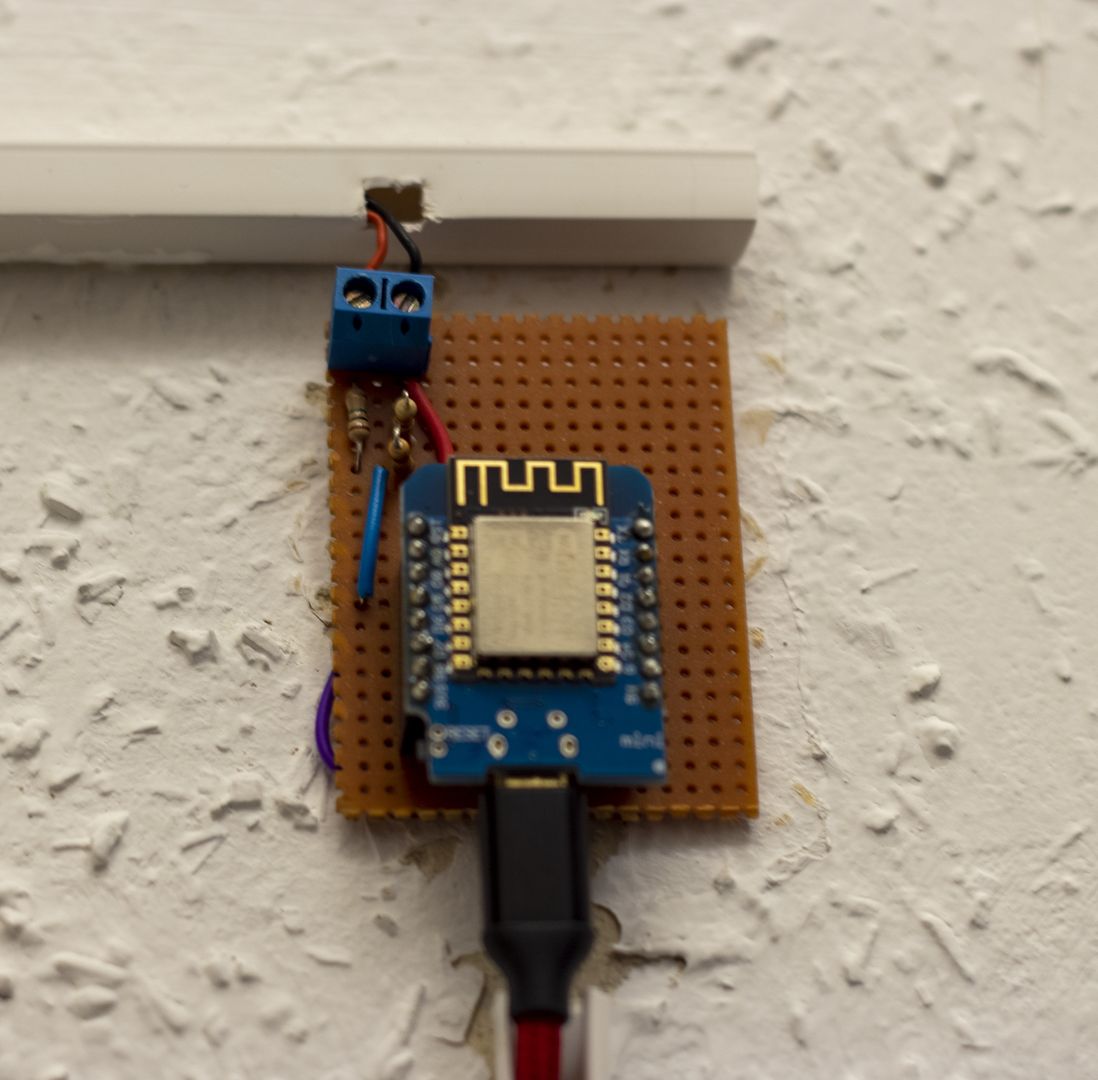
To be able to listen to the bus, the 24V must be reduced to 3.3V, which an ESP8266 can process.
In this case, a simple voltage divider made up of 1MΩ and 147kΩ is sufficient.
In my first version I had read the voltage level via the analog input and evaluated it directly in the loop(). The problem was that the jitter was too high, so the length of the pulses was not reliably detected. Because of this the ringing was often not recognized.
In the current version I read the voltage as digital input and use the code of Aaron, where the edge changes call an interrupt function to decode the messages.
The finished code can be found in my Github Repository as always.
Connecting to Home Assistant
MQTT Disovery
The original idea was to implement the connection to Home Assistant via ESPHome. Unfortunately the interrupt does not work with this, so the solution is now a direct MQTT connection.
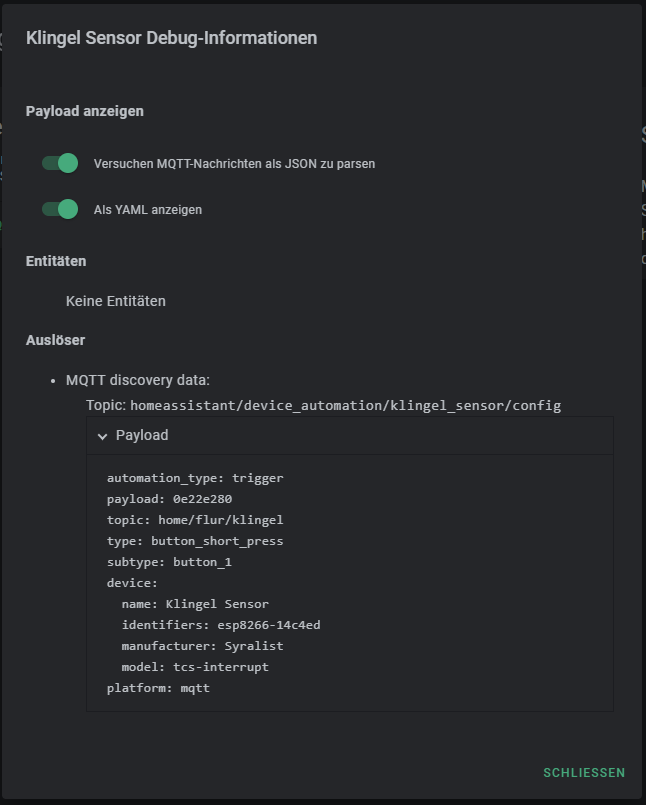
The configuration in Home Assistant is done by MQTT Discovery. For this a JSON payload is sent to the topic
homeassistant/device_automation/klingel_sensor/config. It is important to set the retain flag, otherwise
Home Assistant forgets the configuration on restart.
|
|
The payload in the JSON corresponds to the message read from the bus when the own bell is pressed. To find the matching message, simply connect to the MQTT broker and see what is sent on the configured topic when the bell is pressed.
With this configuration you have created a device in the Home Assistant without entities but with a MQTT Device Trigger,
which can be used as a trigger for automations.
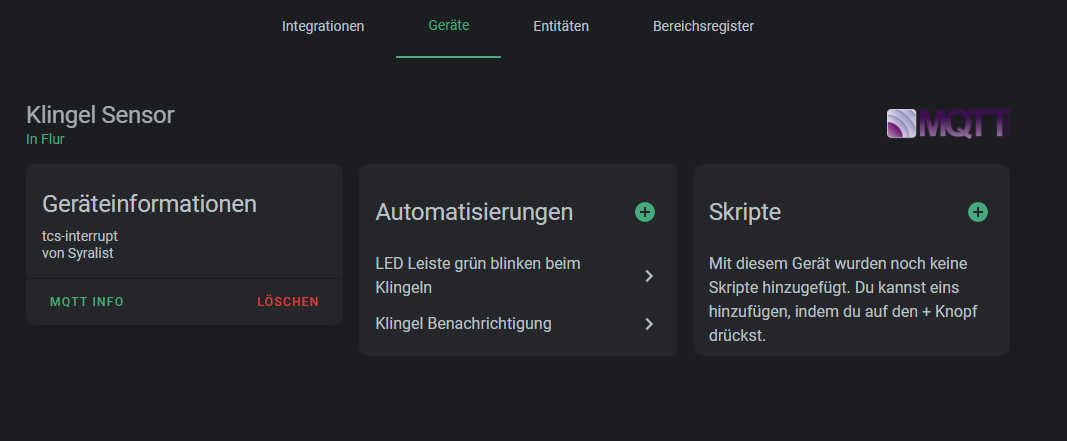
Automations
I have linked two automations with the bell. On the one hand I get a notification on my cell phone via the Home Assistant App. On the other hand I let a LED bar flash green, but only if my PC is switched on. This way I can see the ringing even when I use headphones.
Translated with www.DeepL.com/Translator (free version)